8/18/12
Harvesting and Drying Herbs
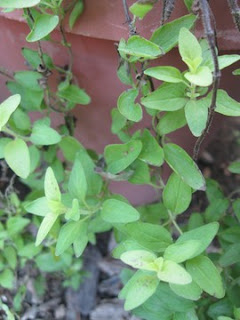
Being a landscape designer in Santa Clarita, and a huge edible gardening fan, I am happy to say that it is the height of the season for a lot of my favorite herbs. My basil is looking and tasting fabulous (as long as I trim off the flowers) my oregano is trailing lazily over container lips and garden walls, and my chocolate mint is a pleasure to water as it perfumes the back patio. That said, it is time for me to start planning for my cooler weather herb usage.
It is time to think about drying some of my bounty. Drying herbs is one of the oldest forms of food preservation so there is a long history of utilizing drying to extend your ability to add herbs to your dishes. If you dry herbs you will remove the excess water, which prevents growth of both mold and bacteria, so it is an easy, affordable and safe way to have herbs year round.
First you must know when to harvest herbs because each herb whether root, flower, leaf, or berry has a different best time to harvest. Leaves should be harvested before the flowers begin to open on the plant – that is when they are most fragrant. Flowers such as lavender or chamomile should be harvested just as they begin to open. Berries should be harvested as they ripen (summer and into fall) seeds should be harvested in the fall because that is when they ripen, and roots should be harvested as the plant dies.
There are three main methods to dry herbs, sun drying, hanging herbs, and oven drying. Here is a little about each method, so you can choose the method(s) that work best for you.
Sun Drying – This is a very cost effective method of drying. All you have to do is put a towel on a dry, hard surface (patio, porch, table, planter wall) place your herbs on the towel and make sure that none of them are touching each other. Leave them out in the sun to dry for a bit, checking them in the cool of the evening. If they are completely dry you can bring them in and store them, if not bring them in anyway but put them out again the next day to dry some more. Don’t leave them out over night (especially in humid climates) as they will grab moisture from the air.
Hang Drying Herbs – This is probably the simplest method and works best with herbs that contain little moisture such as thyme, rosemary, dill, and savory. Start off by removing the lowest leaves of each branch of herbs, then bundle four to six of the branches together and tie them with a string. Place each bundle into a brown paper bag with the stems sticking out of the top, and tie the bag with another piece of string. Punch a few holes in the bag for circulation and hang the bags in a cool, dark place for a few weeks.
Drying Herbs in the Oven – This method will dry herbs very effectively and pretty quickly! Preheat your oven to 180 degrees. On a baking sheet place the leaves and stems of the herbs you want to dry. The herbs should be left in the oven for two or three hours. Check them occasionally to see how they are doing. You can also use a microwave to dry herbs however this could pull the moisture out too quickly and cause them to lose their flavor. Simply place the herbs flat on a paper towel in your microwave for about three minute on high. Start with small batches and test the flavor to see if they are up to your standards.
Now you can have garden grown, herbs all year!
If you would like help beautifying your life, think about creating a garden with me. You can call me at 661-917-3521, contact me via email at julie@thegrassisalwaysgreener.net or visit my website.
Labels:
Gardening,
Herbs,
Landscape Design,
Santa Clarita,
Southern California
Subscribe to:
Post Comments (Atom)


0 comments:
Post a Comment